Using Scroll Transitions
Scroll Transitions make it possible to animate the CSS properties of objects based on the position of the scrollbar.
For example, you can set the opacity of an object or move/rotate/scale it based on the scroll position.
Scroll transitions can be configured in the 'CSS3 animations and transitions' properties of an object. For an introduction to CSS3 transitions see also the Transitions tutorial.
For example, you can set the opacity of an object or move/rotate/scale it based on the scroll position.
Scroll transitions can be configured in the 'CSS3 animations and transitions' properties of an object. For an introduction to CSS3 transitions see also the Transitions tutorial.
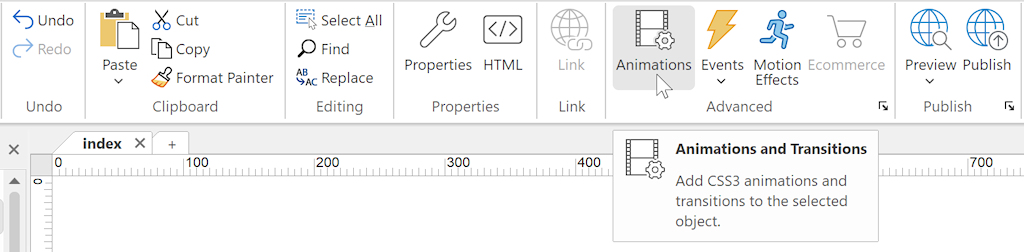
To add scroll transitions, go to the object's animation properties and Click the "add" button in the Transition section.
A Scroll Transition (also known as key frame) needs a start and end value, so you will always have at least two entries in the Transitions section. The first key frame defines the begin value of the animation and the second the end value. For example, set the opacity of the object at the start (0) and the end (1) of the animation (fade in based on the scrollbar position). It is also possible to have more key frames for complexer animations.
Offset
The offset property specifies the position of the key frame relative to the anchor. The offset can be positive or negative.
Anchor
The anchor property (in combination with the offset) specifies at which scroll position the key frame will be triggered.
There are two modes for key frames: absolute and relative mode
Absolute mode (or document mode)
The key frames are defined as absolute values describing how much the page has been scrolled.
The following anchor values are used for absolute mode:
start, the offset property specifies offset from the top of the page.
end, the offset property specifies offset from the bottom of the page.
Note that this mode is only useful is you are using fixed page layout, in which case the position of the object is always the same.
When using layout grids or responsive layouts with breakpoints then you do not know exactly where the object will be in the page, so in that case you should use relative mode instead.
Relative mode (or viewport mode)
Instead of defining a key frame relative to the page you can also define it depending on the position of an object in relation to the viewport.
The following anchor values are used for relative mode:
top, when the object's top is aligned with the top of the viewport
top-bottom, when the bottom of the object is at the top of the viewport
bottom, when the bottom of the object is aligned with the top of the viewport
bottom-top, when the top of the object is aligned with the bottom of the viewport
center, when the object is at the center of the view port
center-bottom, when the bottom of the object is at the center of the view port
center-top, when the top of the object is at the center of the view port
Example 1: Change the opacity of an object based on the scrollbar position.
Step 1
First make sure the page has enough content so the page has a scrollbar and the object is not initially visible in the viewport.
In this example I am using a shape positioned at (435, 1500)
Step 2
Add the first key frame with the values as shown in the image below. This will set the opacity of the shape to 0 when it's outside the viewport.
Step 3
Add the second frame with the values as shown in the image below. This will set the opacity of the shape to 1 when it's scrolled 400 pixels into the viewport. Note that for all positions in between the two key frames, the opacity will be animated so the shape will slowly fade into view.
Add the second frame with the values as shown in the image below. This will set the opacity of the shape to 1 when it's scrolled 400 pixels into the viewport. Note that for all positions in between the two key frames, the opacity will be animated so the shape will slowly fade into view.
You can view a live demo here:
https://www.wysiwygwebbuilder.com/support/scrolltransitions1.html
https://www.wysiwygwebbuilder.com/support/scrolltransitions1.html
Example 2: Transform (rotate/scale) an object based on the scrollbar position.
Step 1
First make sure the page has enough content so the page has a scrollbar and the object is not initially visible in the viewport.
In this example I am using a text object positioned at 272, 1140
Step 2
Add the first key frame with the values as shown in the image below. This will set the scale of the text 0 when it's outside the viewport.
Note that an extra offset was added, so the animation starts 50 pixels outside of the viewport.
Step 3
Add a second frame with the values as shown in the image below. This will set the angle to 1440 degrees and scale to 1 when the text is scrolled 500 pixels into the viewport.
Add a second frame with the values as shown in the image below. This will set the angle to 1440 degrees and scale to 1 when the text is scrolled 500 pixels into the viewport.
Step 4
Add a third frame with the values as shown in the image below. This will set the scale of the text to 4 when it's scrolled 750 pixels into the viewport while keeping the angle the same as in the previous key frame.
Add a third frame with the values as shown in the image below. This will set the scale of the text to 4 when it's scrolled 750 pixels into the viewport while keeping the angle the same as in the previous key frame.
You can view a live demo here:
https://www.wysiwygwebbuilder.com/support/scrolltransitions2.html
https://www.wysiwygwebbuilder.com/support/scrolltransitions2.html
Example 3: Display a fixed object and animate the horizontal position based on the scrollbar position.
In this example we will be using a sticky layer to display a text object at a fixed position. The text will slide from the right into the viewport based on the position of the scrollbar. We will do this by animating the 'left' property.
Tip: when animating the position of an object it may be useful to set the overflow of the property of the page to 'hidden' otherwise the browsers will add scrollbars when the object is outside the viewport. Also note that when the object is part of a layer, layout grid or other container then the animation will be relative to its parent, because an object cannot 'break out' of its container!
Step 1
Add a Sticky Layer with delay set to 0 and put a text object inside of it. Using a Sticky Layer will make sure the text will be display a fixed position.
Step 2
Add the first key frame to the text object with the values as shown in the image below. This will set the left position to 110%, so it will be outside the viewport when you load the page.
Step 3
Add a second frame with the values as shown in the image below. This will move the object to 25% of the viewport at 1000 pixels from the start of the page.
Add a second frame with the values as shown in the image below. This will move the object to 25% of the viewport at 1000 pixels from the start of the page.
You can view a live demo here:
https://www.wysiwygwebbuilder.com/support/scrolltransitions3.html
https://www.wysiwygwebbuilder.com/support/scrolltransitions3.html
More Examples
The demo project also include examples to demonstrate background color animation, make an object 'fly-in' at a different speed as the rest of the content and how to implement a parallax effect using scroll transitions.
https//www.wysiwygwebbuilder.com/support/scrolltransition_color.html
https//www.wysiwygwebbuilder.com/support/scrolltransition_gradient.html
https//www.wysiwygwebbuilder.com/support/scrolltransition_flyin.html
https//www.wysiwygwebbuilder.com/support/scrolltransition_parallax.html
Download the demo projects:
https//www.wysiwygwebbuilder.com/support/scrolltransitions.zip